Each vegetable grower sooner or later wonders what kind of tomato to plant in his own area, so that the crop is plentiful, the care is simple, and the taste of the fruit is excellent. Often the choice falls on a relatively young tomato variety Major F1, which fully satisfies all of the above criteria. What are the characteristics and features of growing Major F1, read on.
Characterization and description of the variety
Major F1 is one of the indeterminate (growth is unlimited), tall, non-standard hybrids. The variety is notable for its unpretentious care, but it is worth remembering that in the harsh conditions of the northern regions it will feel good and bear fruit only in the greenhouse, and as for the central and southern regions, this variety can be planted here in open ground.
The key characteristics that can describe a variety include the following:

- Mid-ripening - ripe fruits can be harvested already 105–110 days after emergence.
- The height of indeterminate bushes is from 1.5 to 1.8 m. It is recommended to form bushes in one or two stems.
- Large green foliage, which in its shape resembles potato and has a pronounced tart tomato aroma.
- Simple without creases inflorescences.
- Large fruits, rounded in shape, with 6 chambers, pink (raspberry) color, with fleshy, sugary, juicy, slightly ribbed flesh. Their weight reaches 150-300 g.
- Sweet and sour taste of fruits.
- High yield: from 1 m², an average of 7 kg of tomatoes is harvested, but this figure can grow up to 8-12 kg / 1 m² with proper care.
Major F1 is an ideal variety for fresh consumption and for the preparation of salads. Due to the large size of the fruit and the characteristics of the pulp, it is not suitable for pickling. But from such tomatoes excellent juices and sauces are obtained.Important! Tomatoes of this variety will be much tastier if fully ripened in the bushes. It is not recommended to pick tomatoes unripe and place them on full maturation on a windowsill or in a box.
Advantages and disadvantages of the variety
- Thanks to the skillful selection result, the hybrid variety has several advantages:
- resistance to tomato diseases and environmental conditions;
- crop stability;
- excellent tastes of tomatoes;
- excellent presentation of fruits: beautiful shape, bright glossy color;
- good safety and transportability;
- the ability to form a bush in 1 and 2 stems;
- precocity;
- the strength of the stalks that do not break under the weight of the hands;
- the possibility of growing in greenhouse conditions, open ground and under the film.
- The minor disadvantages of the variety include:
- exactingness to nutritiousness of the soil and timely measures of leaving: top dressing, watering, loosening, pinching;
- the need to tie up the bush due to its height;
- poor seed germination in case of non-compliance with the rules of agricultural technology;
- sensitivity to cladosporiosis;
- lack of ability to pickle tomatoes in their entirety.
Did you know? In the small Spanish town of Bunyol, the La Tomatina festival is held annually, during which tomato fights are held. About 40 thousand people traditionally take part in the festival.
Acceptable timing for growing tomato Major F1
The optimal terms for growing seedlings and transplanting it to a permanent place, summer residents and farmers determine individually, focusing on the climatic conditions of the environment. Breeders recommend sowing seeds approximately two months before transplanting to a permanent place. So, if tomatoes are grown in greenhouse conditions, the transplant can be carried out in early or mid-April, in which case the seeds can be sown in early February. Provided that Major F1 will be grown in open ground, it is worth considering that transplanting seedlings can only be carried out after the temperature of the upper earth layer is stably kept at + 15 ° C and the possibility of the return of night frosts that can adversely affect the young culture. Accordingly, you need to plant a tomato variety in open ground around the end of May or early June, and sow seeds in late March or early April.
Did you know? It is generally accepted that tomatoes — they are annual plants, but under tropical conditions, the culture grows and bears fruit for several years.
The basic rules of growing
You can get a good crop of tomatoes of the Major F1 variety only with strict observance of the rules of agricultural technology, for more details about which read further.
Growing seedlings
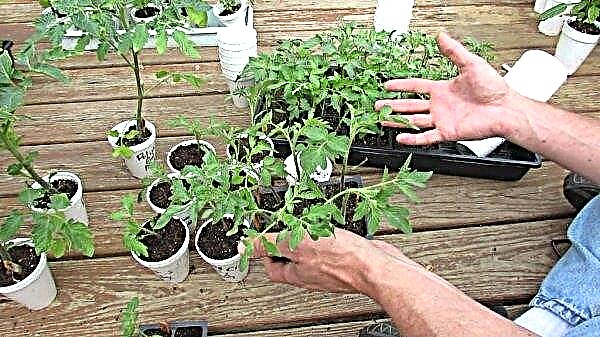
Cultivation of the variety begins with growing seedlings. The technology of this process consists in the implementation of the following points:
- Soil preparation. Ready-made soil mix can be purchased at a specialized store, but you can cook it yourself by mixing 4 parts of peat, 1 part of turf land and a quarter of mullein. In every 10 l of substrate it is recommended to add river sand (3 l), ammonium nitrate (10 g), superphosphate (2-3 g) and a little potassium chloride (1-1.5 g). You can slightly change the soil consistency by selecting the following components for it: humus, peat, turf soil (1: 1: 1), and then add wood ash (1.5 tbsp.), Superphosphate (3 tbsp. ), potassium sulfate (1 tbsp.) and urea (1 tsp.). An obligatory measure of soil preparation is disinfection: it is advisable to pour the substrate with a weak solution of potassium permanganate, steam it in a water bath or warm it in the oven.

- Seed preparation. Initially, it is worth purchasing high-quality seed material. To do this, you need to study information and reviews about the manufacturer. You can check the quality of the seed by placing it in a saline solution (30–40 g of salt / 1 liter of water). Seeds are lowered into the solution for about 10 minutes. Those that after the indicated time will remain floating on the surface are unsuitable for sowing: they will not sprout. Since Major F1 may have poor germination, it is recommended to soak the seeds in a solution of a growth stimulator (“Heteroauxin”, “Epin”, “Zircon”) before sowing. You can also resort to the help of folk stimulants - honey (1 tsp / glass of water) or aloe juice. The exposure time is half an hour. For disinfection purposes, planting material is placed for 2 hours in a light pink potassium permanganate solution. The next seed preparation measure is germination. In a flat container (plate) you need to place wet towels of paper or cloth and spread the seeds on them. Then the container is covered and put in a warm and dark place for 10-20 hours. As soon as the seeds swell, they must be sown immediately.

- Preparing containers for planting. It is best to use special seedlings or containers.
- Preparation of planting holes and sowing of seeds. The depth of each pit should be 1-1.5 cm, and the distance between them should be 3 cm. Grooves can be made. Place the seeds in the prepared recesses and, covering with a film, put in a warm place. At a temperature of + 25 ° C, the first sprouts will appear after 7 days.
- Providing proper lighting. As soon as the seeds sprout, the seedlings need to provide good lighting - 12-16 hours a day. In the first week, it is recommended to provide seedlings with round-the-clock illumination. With a lack of light, the seedlings will stretch, become thin and weak.
- Ensuring optimal temperature conditions. The temperature in the place where the seedlings are located should be + 20ºС during the day and not less than + 14 ... + 16ºС at night.
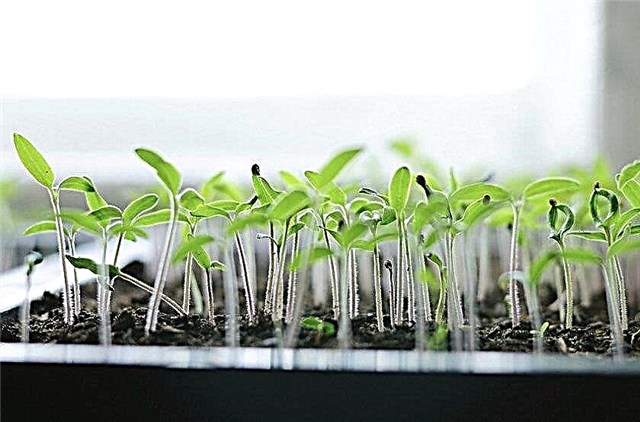
- Ensuring proper watering. Before the appearance of 5 real leaves on seedlings, it is necessary to water it once every 7 days, after the appearance - once every 3-4 days. Water must be warm and filtered.
- Timely dive. 12-18 days after germination, seedlings are dived. At the same time, she must have 2 true leaves. Seedlings are watered, gently undermine with a teaspoon and removed from the tank. Then each seedling is placed in a separate container (plastic cup), after having shortened the central root by a third.

- Fertilizer - the key to a healthy and quality growth of seedlings. For the first time, top dressing is applied immediately after a dive. Ammonium nitrate, superphosphate, and potassium salt (8–12 g, 40 g, and 7–10 g, respectively) are used as fertilizers. All this is bred in 10 liters of water. After 8-10 days, a second top dressing is carried out with fermented chicken manure, diluted in water in a proportion of 1:10. 60 g of superphosphate are added to the mixture. The third time fertilizers are applied 3-4 days before landing at a permanent place. This top dressing consists of ammonium nitrate (10 g), superphosphate (40 g), potassium chloride (60 g) and water (10 l). All of the above dressings are applied at the root and carried out immediately after watering.
Treatment of a plot for planting seedlings
This stage comes down to cleaning the site and preparing the soil, which you need to start doing in the fall. So, the site is cleared of the remains of those plants that grew here in the previous season. By the way, legumes, cucumbers, zucchini, carrots, onions, but not solanaceous, are considered good predecessors of tomatoes.
Autumn soil preparation consists in deep cultivation, plowing, harrowing and fertilizing. In the soil mixture (this variety prefers black soil), it is necessary to add humus, compost, fine sand in equal parts. It needs to be fertilized with superphosphate (3 tbsp. L.), Wood ash (2 tbsp.) And potassium sulfate (1 tbsp. Proportions are indicated per 1 m². It will be good if the soil freezes over in winter: frost will destroy most harmful bacteria.
In spring, before planting, it is worth digging the soil deep and treating it with a hot solution of copper sulfate (7 days before transplanting).Important! Experienced vegetable growers recommend preparing a soil mixture for sowing tomato seeds on their own, since the components of such a substrate will be taken from their own garden, therefore, it will be much easier for seedlings to take root after transplanting to a permanent place.
Seedling Planting Technology
Planting seedlings in a permanent place begins with their hardening. It is necessary to start the procedure 2-3 weeks before the intended planting: containers with seedlings are first exposed to the open air for half an hour and gradually increase the time to a whole day. The landing process itself consists of the following steps:
- Preparation of planting holes - their depth should be 3-4 cm greater than the depth of the containers in which the seedlings grow.
- Compliance with the correct landing pattern - 30 × 40 cm.
- Fertilizing holes with rotted manure or humus.
- Place seedlings in prepared holes - they are carefully removed from glasses or pots and planted in a new place, without destroying the earthen lump. The holes are buried tightly.
- Mulching seedlings - as a mulch you can take manure mixed with sawdust, sweet leaves, humus.
Important! The optimal weather for planting seedlings is cloudy and cool. You can also carry out the procedure in the evening, if the street is already very warm.
Variety Care Features
Care for Major F1 comes down to watering, top dressing, forming a bush, loosening and weeding the soil, as well as treating diseases and eliminating pests.
Watering
This culture is very demanding on soil moisture, so it is worth strictly observing the rules of irrigation. So, the Major F1 variety needs to be watered 2 times a week, using warm, settled water (at least + 15 ° C, the optimum temperature is + 20 ° C). On one bush, it is recommended to use 5 liters of water. Type of irrigation - drip irrigation. The procedure is best done in the early morning or evening. If hot days have come, then the tomatoes will need daily watering.
Top dressing
Like all other varieties, Major F1 needs regular fertilizer (preferably 3 times per season):
- After 8-10 days after planting in a permanent place, phosphorus-potassium fertilizers must be applied. To do this, prepare the following liquid: dissolve 500 ml of bird droppings in 10 liters of water, 1 tbsp. l superphosphate and 1 part potassium sulfate. Consumption per plant - 500 ml.
- At the flowering stage, it is advisable to spray the bushes with a solution of boric acid in a ratio of 1 g / 1 l of water. Such a measure will prevent the falling of flowers and ovaries. Consumption - 10 l / 1 m².
- After fruit setting, organic fertilizers must be applied: dissolve 500 ml of liquid mullein and 1 tbsp. In 10 l of water. nitrofoski. Consumption - 500 ml / 1 bush.
Video: Topping a tomato to increase yield
Pasynkovka and formation of a bush
The tomato variety Major needs to be planted and bush formed.
The formation of a bush in one stalk consists in the removal of all stepsons, i.e., side shoots that grow from deciduous sinuses. If the bush is formed in two stems, then leave the central shoot and stepson, located under the first flower brush, which should become the second trunk. The procedure is carried out immediately after planting seedlings in a permanent place. As new stepsons appear, they are plucked.
Since the culture belongs to tall, its bushes need a garter. As a support, you can use wooden pegs.
Soil cultivation and weeding
In order to prevent diseases, as well as to prevent stagnation of moisture and the formation of mold crust on the surface of the soil, it is necessary to regularly loosen the soil under tomato bushes and weed.
Procedures should be carried out every 12-14 days. It will also help saturate the soil with oxygen and prevent the appearance of parasites on the root system.
Important! Neglecting at least one rule of care can lead not only to lower yields, but also to the death of crops.
Diseases and pests and their prevention
In general, the variety is resistant to most tomato diseases and pest attacks if prophylactic measures are followed (adhere to watering, top dressing, fertilizer, etc.). But even with the most responsible care, tomatoes of the Major variety can suffer from the following diseases and pests:
- Scoops - insects that can damage both the green mass and the fruits and even the roots of the plant. Get rid of uninvited guests will help the drug "Arrow", a solution of which you need to spray the bushes according to the instructions.

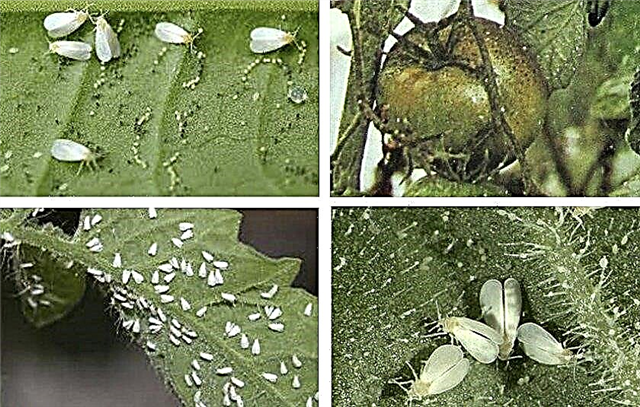
- Whiteflies - small but harmful insects. Pest larvae are especially dangerous in themselves, sucking the juices from the plant and are the source of the appearance of fungal spores. Fighting a pest using Confidor or Confidor-Maxi drugs.
- Cladosporiosis - manifested by the presence of brown spots on foliage and tomato fruits caused by fungi. Prevention - compliance with crop rotation, air humidity and temperature conditions, proper and deep cleaning of the soil before planting, disinfection. Spraying bushes with a solution of iodine chloride will help to overcome the disease (30 g of calcium chloride and 40 drops of iodine are dissolved in a bucket of water).

Important! Before planting tomatoes in a greenhouse, its design must be sanitized. — treat with a solution of lime.
Basic rules for the collection and storage of crops
The most delicious fruits of the Major F1 variety are those that ripen on the bush. It is worth collecting them as they mature - starting in August. If the colds come, you can pick and slightly browned and even green fruits that will ripen at room temperature, but will no longer be as tasty as those that were ripped from the bush in a mature form. For storage, you need to choose unripe healthy tomatoes, without damage by insects or mechanical nature, which are stacked in dense layers in wooden boxes.The boxes themselves are placed in a cool place with good ventilation. In such conditions, tomatoes can maintain a fresh look and taste for up to two months.
You can collect a good crop of delicious tomatoes of the Major F1 variety if you strictly observe the rules of agricultural technology. Providing the culture with good and proper care, you are sure to get a rich and fragrant crop of delicious fruits.


