Of the variety of sweet peppers, the Red Shovel variety deserves special attention. Juicy fruits of red color have excellent taste, can decorate any table and are ideal for preservation. The variety was bred by Russian breeders, well adapted to diseases, weather changes and other external factors. Growing red shovel pepper is not difficult if you know the features of its agricultural technology, which we will discuss in this article.
Description and characteristics of the variety
Red shovel is an early ripening variety, ripening in 100-110 days from the appearance of seedlings. It is suitable for cultivation both in greenhouses and in open areas. Bushes of pepper are compact, not too branched, but rather high (up to 80 cm), due to which they can not tolerate strong winds and need bearing during fruiting. Shoots are thin, with large leaves at the top. A crop is formed at the bottom of the bush. On one plant, about 15 large fruits can ripen at the same time, which in terms of 1 m² is 5–6 kg - for sweet pepper, this is a good yield.
Did you know? Red pepper is superior to carrots in terms of vitamin A content, and there is more vitamin C in it than in citrus fruits. In this case, the calorie content of the fresh product is only 27 kcal per 100 g.
Peppers themselves, as the name implies, are red, one-dimensional, large: the average weight of the fruit is 120–140 g with a length of 15–20 cm, but there are specimens over 150 g. In shape, the peppers really resemble a palm or a shovel - they are conical, elongated and flattened, due to which they ideally fold in the bank during conservation. The pulp is fleshy (wall thickness 6–8 mm), dense, but juicy, with a pronounced sweet taste and pleasant pepper aroma. In application, the fruits are universal: suitable for any harvesting and use in kind.
Pros and cons of the variety
- Gardeners speak very well about the variety Red Shovel, highlighting its following positive qualities:
- early ripening;
- attractive presentation of fruits (large size, shape, bright skin color);
- good preservation of fruits and ability to transport;
- delicate aroma and excellent taste;
- high productivity;
- universal application in cooking;
- unpretentiousness and resistance to diseases;
- the simplicity of agricultural technology, allowing peppers to grow even beginner gardeners.
The variety has no significant drawbacks, except that the bushes must be formed and tied, otherwise the shoots can break under the weight of the crop.
Planting and growing peppers
Red shovel, like all sweet varieties of pepper, has a long growing season, so it is recommended to grow seedlings for open ground. Seeds are sown approximately 2–2.5 months before planting on the garden bed. Therefore, in order to have grown planting material by mid-May, sowing should be done in late February or early March. The process of growing seedlings itself consists of several stages.
Seed preparation
Any seeds, both ours and purchased, must be prepared and tested for germination before sowing, since there are always certain risks.
This preparation includes the following activities:
- Material disinfection. For 30 minutes, it must be placed in a solution of potassium permanganate, then remove and dry. At this stage, the seed quality is checked: full-bodied ones settle to the bottom, and empty and unfit for planting pop up.
- Hardening. The dried seeds are kept in the refrigerator for 10-12 hours. This will make future seedlings more resistant to cold and temperature extremes.
- Germination. In 1 layer, the seeds are laid out on a damp cloth (gauze), covered and placed in a warm place. All the time, until the shoots appear, it is necessary to maintain humidity. You can moisten the tissue with water or with a stimulating solution of Epina, Kornevina, and Heteroauxin.
Tank selection
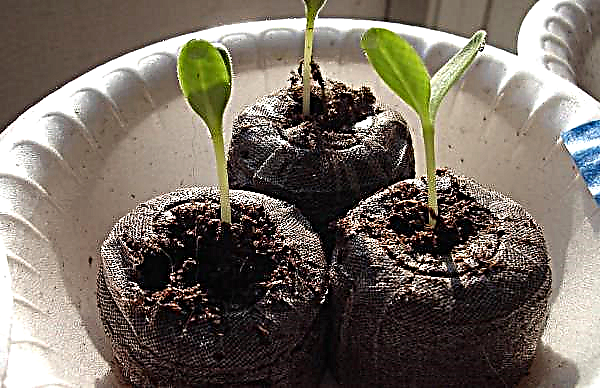
Peppers are best planted immediately in separate containers. It can be cups, cassettes, peat pots or tablets. The advantage of individual containers is that the plants do not need a pick, which leads to damage to the roots and stunted growth. You can also use a shared box or container. In this case, the seeds are planted with nests of 2-3 pieces at a distance of at least 4 cm from each other.
Land preparation
For seedlings, it is more convenient to use a ready-made substrate purchased in a store. It already contains the necessary elements and does not need disinfection. It remains only to pour it into glasses and sow seeds. If desired, it can be mixed in half with garden soil, so that after transplanting to the garden bed, the seedlings will quickly adapt. But ordinary land must be thoroughly sanitized. The same should be done with a substrate prepared by hand.
It is possible to make the soil mixture yourself from 2 parts of humus or leaf compost, 1 part of sand and 1 part of garden soil with the addition of 1-2 tbsp. l ashes. All components must be mixed and thoroughly disinfected: pour boiling water with boiling water, a solution of potassium permanganate or calcine in the oven at a temperature of +60 ... + 80 ° C for an hour. When the substrate dries (cools), it is distributed in cups, moistened if necessary, and then the seeds are sown to a depth of 1.5 cm. Next, the containers are covered with a film and put in a warm place (+24 ... + 26 ° C) until sprouts appear .
Features seedlings care
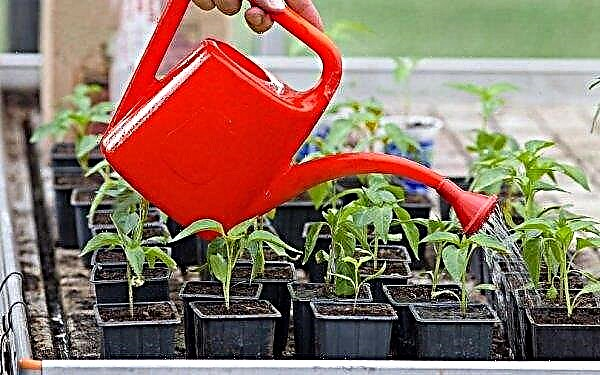
With the advent of the first shoots, the film is removed, and the plants are rearranged closer to the sun. At this stage, the ambient temperature should be reduced to + 20 ... + 23 ° C so that the sprouts do not stretch. Further care consists of periodic watering, gently loosening the substrate and maintaining the temperature regime. It is impossible to fill in the sprouts, because fungal diseases can develop from overmoistening, including the black leg - the most dangerous enemy of seedlings of solanaceous crops. For the normal development of pepper requires daylight hours of at least 12 hours, which on cloudy days must be provided artificially.
Important! Pepper seedlings do not tolerate drafts, so you should not open windows if it is on the windowsill. You must also remember that when the temperature drops to +12°C growth of peppers slows down.
If a special substrate was used for sowing seeds, then it is not necessary to feed the seedlings before transplanting into the soil, except when it grows too slowly. In the absence of fertilizers in the soil, top dressing is carried out with a frequency of 2-3 weeks. Fertilizers can be used both mineral and organic. Mineral dressing is prepared from superphosphate (3 g) with the addition of saltpeter and potassium salt (1 g each) diluted in 1 liter of water. From organics, peppers love ash, tea tea and green grass fertilizer. Plants planted in a common container should be dived when 1-2 true leaves appear. They are seated in separate containers filled with the same substrate. 10-14 days before transplanting into the soil, seedlings are quenched in air, daily increasing the procedure time from 15 minutes to 2 hours. In recent days, it is recommended to leave the plants all night.
Landing Technology
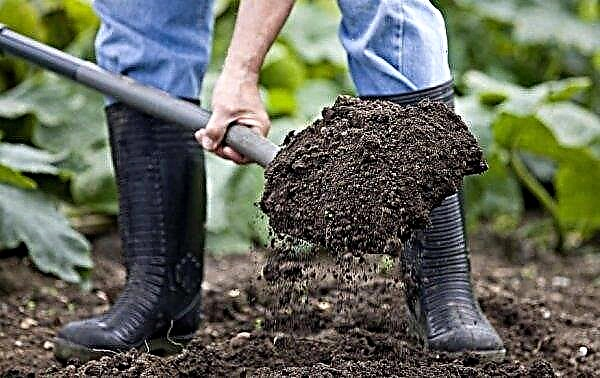
Peppers are transplanted to the bed at the stage of formation of the first buds, which corresponds to approximately two months of age. Landing is carried out not earlier than the threat of spring night frosts passes, and the earth warms up to a temperature of + 12 ... + 14 ° C. By the time of planting, the site should be dug up and saturated with organic fertilizers. 3-5 days before transplanting, the bed is disinfected with a solution of copper sulfate (1 tbsp. L / 10 l of water).
Did you know? You can not plant sweet pepper next to sharp varieties. Plants are pollinated, which changes the taste of the fruit. — sweet peppers become bitter and tasteless.
You can shed the earth with boiling water or potassium permanganate, but on large areas it is still better to use fungicides that destroy pathogenic and fungal flora. Seedlings are planted in holes dug at a distance of 40 cm from each other and 50-60 cm between rows. In this scheme, 4 plants are placed per 1 m². The depth of the holes should be such that, when planting, the root neck of the plant is flush with the surface. In each hole pour 1 tbsp. complex mineral fertilizer (superphosphate is suitable), mix it with the earth, and then pour warm water. When the moisture is absorbed, a seedling is placed in the center of the hole and the roots are gently poured, slightly tamping the ground. Planting is recommended to be practiced on a cloudy day or in the evening to prevent leaf burns. If the climate in the region is unstable, then for some time at night the plants can be covered with cut-off plastic bottles, and open during the day.
After landing care
Peppers care after transplantation consists in regular watering, top dressing, loosening the beds, as well as the formation of bushes.
Watering and feeding
Since pepper does not accept stagnation of moisture, it is necessary to water it only when the top layer of soil dries. Before flowering, watering is carried out 1-2 times in 7 days, depending on the weather. At first, the plants may have a sluggish appearance, but you still do not need to fill in - it's just an adaptation, over time the leaves will acquire a turgor.
During flowering and the formation of ovaries, plants are watered 2 times more often at the rate of 1.5 l / 1 bush. Watering is carried out with warm, settled water by the method of sprinkling (from a watering can). To make moisture evaporate more slowly, the bed is covered with mulch. Slowing growth and dropping ovaries indicate that plants lack watering. For the entire period, from planting on the garden to harvesting, peppers are fed 2 times. The first feeding with liquid chicken droppings at a concentration of 1:10 is carried out 2 weeks after transplantation. The second, consisting of a mineral complex, including potassium and phosphorus, is carried out 10 days after the first. Sometimes additional foliar top dressing is required, the need for which can be determined by the condition of the leaves (curling and drying of the edges, the appearance of a marble color or a grayish tint).
Soil loosening
To improve oxygen access to the roots, after each watering, the soil on the bed should be loosened shallow. Deeper loosening together with weeding weeds is carried out every 2-3 weeks. The best time for procedures is evening or a cloudy day, because in the sun the earth quickly becomes dry.
Important! The roots of the peppers are located close to the surface, so you need to loosen carefully, not greatly deepening the tool in the near-stem zone.
Trimming and shaping a bush
The bushes of the Red Shovel are quite tall. The top can reach a height of 80 cm, which negatively affects the yield of the plant and its ability to withstand winds. To prevent the bush from wasting its potential to build green mass, it is recommended to prune the central shoot at the level of 25-30 cm. This will cause the plant to shrub and lead to more ovaries. In the future, it is recommended to form a bush in 2-3 stems, so the strongest shoots of the first order are left, the rest are removed. The stepsons formed on these shoots also need to be nipped as they appear. When 15–20 fruits are tied in the bush, the tops of the shoots should be pinched off to avoid overloading the crop. To strengthen the bush, it is recommended to install a support peg and tie a plant to it.
Diseases and pests
Among other varieties of pepper, Red Shovel is considered the most resistant to disease. Even in rainy summers, fruits are rarely affected by rot, fusarium infection, late blight, and other fungal infections. Problems can occur only on running beds, so it is important to regularly clean weeds and carry out preventive treatment of bushes.
To do this, it is advisable to use folk remedies or biological products, since chemicals accumulate in the fruits. Pests that live in the ground, such as wireworms, are disposed of by disinfection and digging the soil before planting, but it is very difficult to protect the bushes from slugs, aphids and spider mites. If slugs appear on the bed, sprinkle hot pepper or ash on the soil. Garlic or wormwood tincture helps to get rid of spider mites, and a solution of ash or tobacco dust is effective from aphids (dissolve 1 glass in a bucket of hot water). If, despite all the measures taken, the insect population has increased, the use of insecticides, such as Karbofos, Aktofit, Fitokhelp, will be required.
Harvesting and crop applications
If seedlings are planted in mid-May, then after 2 months you can already enjoy fresh peppers. This variety appears on the markets even earlier, since it is grown in greenhouses for sale. Under natural conditions, the ripening period depends on the weather, but on average it is the middle or end of July. Specific harvest dates depend on the use of the fruit. For bookmarks for storage, it is better to remove it at the stage of technical maturity, when the peel has just begun to turn red.
At this stage, the fruits are stacked in rows in a box or basket, shifting each layer with parchment. Store the crop in a basement or cellar at a temperature of + 8 ... + 10 ° C with a humidity of 70–80%. In such conditions, peppers finally ripen in 3-4 weeks. For fresh consumption and for harvesting, peppers are removed at the stage of full (biological) maturity, when the peel has become bright red, and when pressed, a slight crack is heard. Such fruits are ideal for canning, pickling, stuffing and cooking various dishes. A great way to store pepper is to freeze it. Purified from seeds, chopped or whole, it is well frozen and stored, without losing its taste, aroma and its beneficial properties. Red shovel - this is exactly the kind of peppers that you will not have to regret about planting. It does not require complicated care, it always gives a good harvest of beautiful and tasty fruits, and the simplicity of agricultural technology allows it to be grown even by a novice gardener.


