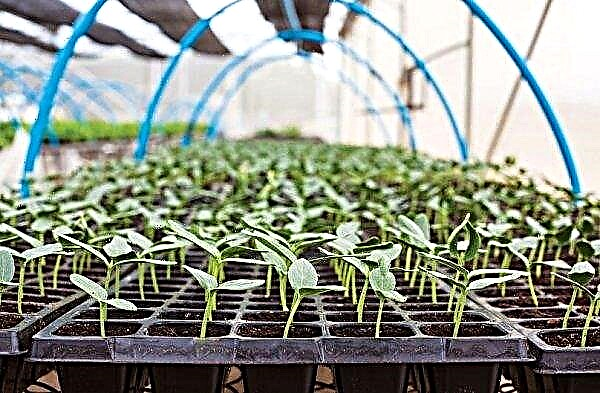
Greenhouses, in which heat should be determined by spring, nevertheless most often do not allow seedlings to be planted in the soil earlier than mid-spring. This is because the heating of the soil in the greenhouses does not keep pace with the heating of the air. The problem is helped by warm beds, which will be discussed in the article.
Why do we need warm beds in a greenhouse?
By a warm bed is meant a landing area in a greenhouse in which the temperature rises in one way or another, allowing seedlings to be planted already with the onset of spring. As a result, it becomes possible to get an early crop of high quality.
- The undoubted advantages of warm beds include:
- guaranteed protection of plant roots from frequent spring frosts;
- a high yield of vegetables on poor soils due to the presence of a high concentration of nutrients in the most common organic heated beds;
- saving on fertilizer due to the same high concentration of nutrients in the soil of the beds;
- activation of photosynthesis due to the release of “biofuel” in the heated soil of carbon dioxide, which is immediately absorbed by the green mass of plants;
- the destruction of weeds whose seeds die during the decay of the biological constituents of warm beds;
- Horticulture and animal husbandry waste management;
- rational use of the internal area of the greenhouse.
- The disadvantages of warm greenhouse beds include:
- additional material and labor costs for their arrangement;
- unpleasant odors accompanying the process of decay in the beds;
- the possibility of accelerated development of pathogenic microorganisms in a warm and humid environment.
Did you know? The idea to grow plants indoors was born almost 5000 years ago in ancient China, as evidenced by archaeological excavations.
Varieties of warm beds
Depending on how the soil is heated in warm beds, they are of three types:
- Beds of the biological method of heating Soils consume heat released during the decay of biomaterial in the form of animal waste and plant residues, which, accordingly, subdivides warm bio-beds into several subspecies depending on the method of use of biomaterials and their types.

- Soil heating with electricity It implies laying heating cables under the bed, which, thanks to the power supply control system, is very functional, but also quite expensive.
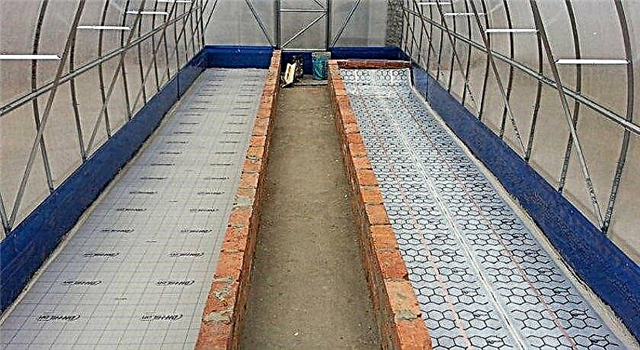
- Water heating of the soil is carried out using pipes laid under the bed through which pre-heated water is passed, which also requires considerable costs for equipment and operation.

How to build yourself
The arrangement of warm beds, depending on the method of heating the soil, can be more or less expensive and expensive, but in most cases it lends itself to independent use. So the answer to the question whether it is possible to make a warm bed with your own hands depends on the minimum skills of working with tools at the vegetable grower. If available, he can only find out how to make an effectively functioning warm bed.
Did you know? The prototype of the current warm beds appeared in ancient Rome, where the gardeners there laid horse dung on the soil surface, which, decomposing, heated the surface of the earth in cold weather.
Material selection
The variety of types of warm beds implies a rich variety of materials used for their construction. Often, these materials can be found in your subsidiary farm, especially when it comes to the construction of the box, limiting the space of the beds.
For this, you can use readily available from:
- polycarbonate;
- wooden boards or panels;
- metal sheets;
- plastic;
- slate;
- plastic bottles.

Most often, the sides of a warm bed are erected from:
- a tree treated with an antiseptic;
- brick, which is a long-term option, but at the same time quite time-consuming;
- slate, which is a cheap and practical material, which, however, releases toxic elements into the soil on chips and therefore requires the use of exclusively whole sheets.
As for heating electric cables and water pipes, their capacities and diameters depend on the specific requirements in each individual case, which will be discussed below.
Dimension and Depth Calculation
It is impossible to properly build and equip a heated soil section without previously prepared diagrams and drawings, the calculation of the dimensions on which is clearly tied to the configuration and area of the greenhouse. Moreover, all 3 main types of beds imply one general principle of size calculation. First of all, when developing a scheme for a future greenhouse, you should determine the places in which the beds with heating will be located. The area of the proposed greenhouse will determine the length and width of the heated land.
As a rule, they are placed along the long sides of the greenhouse, and in the middle of it leave a passage. But there are possible options for their placement in the U-shaped way or in 3 rows with a sufficient area of the greenhouse. Additional calculations are necessary if the soil is supposed to be heated with electricity or hot water. Here you will need to calculate the length of the heating cables or water pipes and a listing of all additional materials.
When calculating, you should also take into account that:
- the depth of the trench for the future bed is usually not less than 0.4 m and not more than 0.7 m;
- the height of the beds can vary from 0.3 m to 0.4 m, which creates the most favorable conditions for weeding and watering;
- the width of the beds can range from 0.45 m to a maximum of 1.2, since the large width prevents the care of vegetables and their lighting from the outside;
- inter-row passage is limited to a minimum of 0.6 m;
- the bottom of the trench is insulated with a heat-insulating material in the form of polystyrene foam, polystyrene foam or empty plastic bottles with screwed caps, so there are several equivalent answers to the question of how to insulate the bottom;
- sand layer up to 0.05 m high;
- a small metal mesh is laid on top, preventing rodents from penetrating into the warm soil;
- either electric heating cable, or water pipes, or organics are laid on the grid;
- then create another airy sand cushion from above;
- the construction is crowned with a layer of fertile soil, which should not be made too thick (the optimum height is 0.3-0.4 m), because otherwise it will not be able to warm up fully.
DIY step-by-step building instructions
Different options for heating the soil in greenhouses imply different options for creating a heating effect.
Electric Warm Beds
The earth in greenhouses is heated with heating cables of either a resistive or self-regulating type. In the first embodiment, no regulation occurs in the heating process, and in the second, by means of a temperature regulator set to the required temperature, the required temperature regime is maintained in the soil. But in both cases, usually proceed from the requirement that for each square. m accounted for power between 75 and 100 watts, which, however, should not exceed 10 watts per meter of cable length.
The arrangement of the soil heating system by means of electricity is as follows:
- They dig a trench with a width of 0.5 m and a depth of 0.6 m. Its length is similar to the size of a greenhouse.
- The earth is tamped on the sides of the trench and at its bottom.
- The bottom is lined with thermal insulation material, the types of which were discussed above.
- A sandy drainage layer 0.05 m high is poured on top.
- A fine-mesh metal mesh is placed on the sand cushion, which, in addition to protecting the root system of the plants from rodent attacks, also serves as a means for attaching the cable.
- The cable is placed on the grid with a snake in increments of 0.15 m.
- On top lay another sand layer with a thickness of 0.05 m.
- On top of the sand there is a metal or plastic mesh designed to protect the cable from mechanical stress during tillage.
- The pie is crowned with a layer of fertile soil up to 0.4 m high.
In the presence of a temperature regulator, its sensor is placed in a corrugated tube, and directly the temperature regulator is hidden in a moisture-resistant container located at least 1 m from the earth's surface.
Video: warm bed
Water warm beds
Since soil heating by means of pipes with hot water requires continuous supply of heated water to these pipes, it means the preliminary installation of either an electric or gas water heating boiler, or a wood-burning stove, again with a boiler, as well as a pump that will ensure constant circulation of hot water through the pipes . Pipes are preferable to metal, because they provide better heat transfer than plastic.
Important! A more frequent arrangement of smaller diameter water pipes heats the soil more efficiently than a smaller number of larger diameter pipes.
The algorithm for creating water heating of the soil in the greenhouse is very similar to that described above with the use of an electric cable. It should be noted that with sufficient complexity of the equipment of this system, it has a significant advantage. It lies in the ability of this system to heat not only the soil, but also the air in the greenhouse, which creates additional comfort in the growth of plants and leads to an increase in their productivity.
Organic Warm Beds
This method of heating the soil in greenhouses is the most popular and in demand due to the cost-effectiveness, efficiency and simplicity of the device. For him, only the simplest building materials and waste from gardening and livestock farming are needed, which are abundant in most households.
Heated soil areas based on the use of organics are divided into 4 types in the form:
- elated;
- in-depth;
- hill-shaped;
- combined.
To create an in-depth version, you must:
- Dig a deep trench, whose edges should be flush with the surface of the greenhouse land.
- At the bottom, fill up a drainage sand pillow.
- Place a fine-mesh mesh of metal on top to protect the root system of plants from attack by rodents.
- The heat-insulating layer can be made from empty plastic bottles with tightly screwed caps.
- Cover the trench walls with dense polyethylene material for additional thermal insulation.
- To lay thick branches and other wood waste of large fractions on a layer of empty plastic bottles.
- Then make a layer of any unnecessary paper.
- To lay smaller wood waste on top of the paper layer.
- The next layer is formed from straw, chopped weeds and tops.
- It is followed by grass and deciduous strata.
- The “pie” is completed by a layer of fertile soil enriched with humus.
The elevated view of the heated soil does not require digging a trench, but involves the use of boxes made of wood treated with antiseptic, slate or plastic sheets.
The creation of a raised bed option proceeds as follows:
- The walls and bottom of the box are lined with a dense polyethylene coating.
- At the bottom lay large-sized wood waste mixed with old paper and cardboard.
- A layer of weeds, waste from vegetables and fruits is placed on top of them.
- The next layer is formed from grass, tops and foliage.
- At the end, lay out a layer of fertile soil.
Important! The long sides of the box should be strengthened with transverse beams to prevent its deformation under the influence of the soil.
To build hill-shaped warm beds, you must:
- Choose a place in the greenhouse where the heated soil hill will be located.
- Dig a shallow trench to the depth of a bayonet shovel.
- Fill it with organic material in the same way as in previous cases, but leaving a small empty space at the edges of the trench.
- To fill this space with fertile soil.
- Top with a layer of fertile soil.
The combined view of the heated soil combines elevated and deepened warm beds.
For its construction requires:
- Dig a trench deep on the bayonet of a shovel.
- Warm its bottom with heat-preserving materials and cover it with a net on top.
- Lay a layer of large wood waste, old newspapers and cardboard.
- Put a low box made of wood, plastic or slate.
- The next layer to form from chips, sawdust, grass, compost, vegetable waste. To complete the formation of a layer of fertile soil.
Recommendations for using a warm bed
The most commonly used heating of the soil due to the heat generated during the decay of organic matter in each case is not constant and changes its temperature and quality indicators over time. Usually a warm bed, charged with organic waste, fully functions for 4 years.
And since in each year from this period it demonstrates different conditions, it is advisable to vary the vegetables grown on it:
- The first year is characterized by maximum heat generated and a high concentration of nitrogen. During this period, it is preferable to plant pumpkins, watermelons, cucumbers, tomatoes, melons, eggplant, peppers, zucchini.
- The next year, the heat generated, having decreased slightly, nevertheless remains at a high level. The same is observed with a high nitrogen content, so it is recommended that the same crops be re-planted as originally. The exceptions are melons, watermelons and pumpkins. It should also not be during this period to grow crops that are prone to saturation with nitrates.
- The third year is most suitable for growing tomatoes, legumes, peppers and cabbage, as well as root crops and herbs.
- In the fourth year, when heat generation is minimized, and the concentration of nutrients is reduced, it is advisable to plant unpretentious crops such as peas, beans and greens.
The creation of new beds with bio-heating is recommended by experts in the greenhouse in the fall after harvest, so that the heat generation is maximum in early spring. Planting seedlings in a greenhouse in early spring and growing it almost in winter soil is quite real, if you resort to the help of warm beds. Some difficulties in their arrangement completely pay off with the numerous advantages that gardeners receive from their use.


